Personalized Morse Code Ring

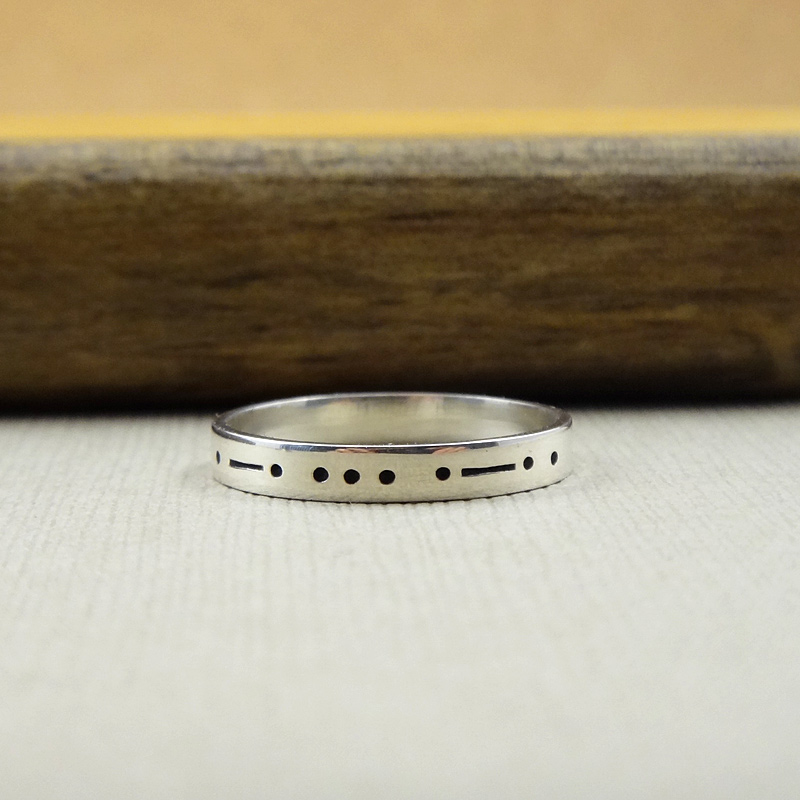
I thought I would feature my Morse Code ring today and talk a little bit about the process of making it. When I first thought of making it, I loved the idea of a secret code on the outside of the ring. I was already making a more slender version you can check out on my website here. I thought why not put some wording on the inside? I came up with this:

morse code ring
Personalized Morse Code Ring

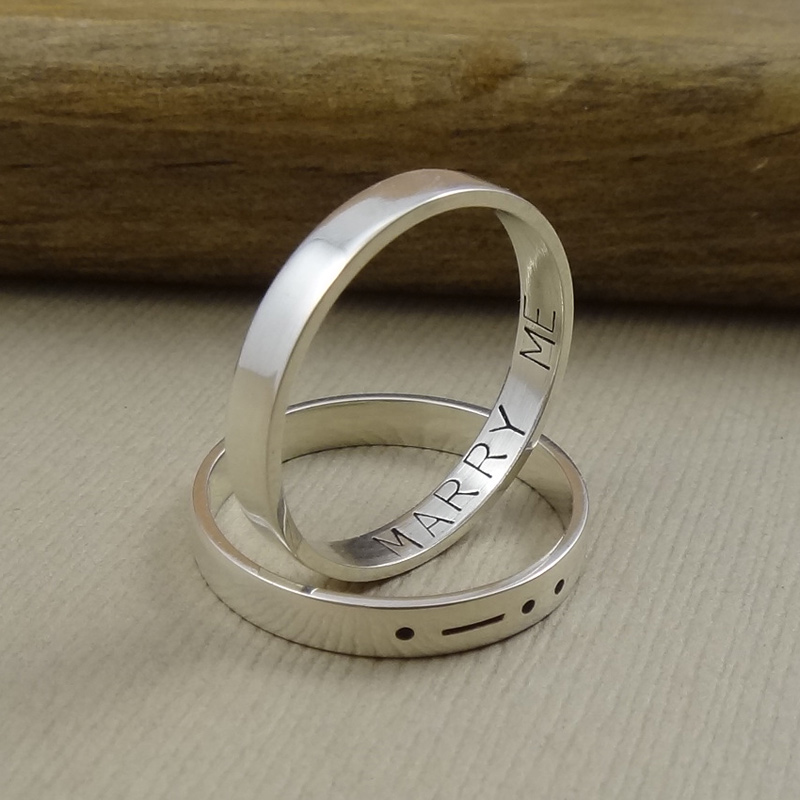
It’s a little bit tricky to make, and can get stressful at times. Trying to hand stamp Morse Code onto a ring in a straight line is in itself an accomplishment. Now throw in some wording on the backside and you might think… crazy! How could I possibly get this right? Practice! and get to know your stamps.

It’s a little bit embarrassing to admit, but when I first started making these Morse Code rings I couldn’t even tell you how many I messed up by either stamping the Morse Code crooked/too deep or messing up the spacing of the phrase on the inside. Luckily, I recycle my silver, but it’s still heartbreaking to see all that work go to waste. Also being a perfectionist doesn’t help. I have to remind myself that I’m not a machine it’s not going to be perfect. Handmade is allowed to be a bit quirky, that’s the beauty of it, right?

Morse Code Ring
Personalized Morse Code Ring

Now that I have a few under my belt, they are way easier to make… It took some practice and a lot of patience but It’s truly a labor of love for me. I’m glad I didn’t give up!

Birthstone Peapod Necklace

I’ve been making pea pod necklace for a while now using freshwater pearls like this one HERE. However, I thought it might be interesting to make one using birthstones. At first I was unsure what type of gemstone/beads I wanted to go with, some can be very expensive and the sizes and colors will most likely not be consistent. Since I planned on offering this pea pod necklace indefinitely, I really wanted to use beads that I knew would be around for years to come. Hence, come in Swarovski crystals.

pea pod necklace
Birthstone Pea Pod Necklace

I hope you like it!

Sanding away surface scratches from your Jewelry

I just can’t live without my sandpaper these days. When I first started I had no idea what grits to use so remove the surface scratches off of my jewelry. So, I thought It might be useful to some to post some of the grades I like to use myself to get the surface scratches off of my sterling silver.

I like to start off with a grade of 220-280 sandpaper (this is really rough, I use it when I’ve got some major marks to remove) then move on to 400 (my favorite to start with) then 650-700 and finish off with a 1000 or 1200.

You can most likely find the sandpaper grit you are looking for in an auto supply store.

The sandpaper is fairly cheap and such a must! I don’t know what I would do without mine 🙂


What are jewelry findings?

It seems a few times a week I’m getting asked the question, “What are findings?”. If you’re new to jewelry making, you’re probably already using them and just don’t realize it. Findings are the connective pieces to your jewelry such as clasps, crimps, jump rings and earwires to name a few. You can buy or create your own findings in virtually every type of metal available.

Now to a completely different topic. I finally have a Twitter account. I know, I know, I’m so behind the times but I’m trying to catch up. If you’re on Twitter, I would love to have you as a friend. Is that even the right lingo to use?

Busy creating handmade jewelry

I’ve been very busy lately making lots of jewelry and filling orders. I was hoping I would have some time to work on my main site perfections.com where I showcase all my jewelry. Unfortunately there’s just not enough hours in the day to get the new pages finished. Hopefully I’ll get some spare time here soon and can work on those pages a bit more. Once I put the pages live, I’ll be sure to post here so everyone can check them out and give some feedback. Don’t get me wrong, I’m extremely happy being busy and having lots of orders to fill.

Learning how to Saw Sterling Silver Sheet Metal

I recently purchased a jewelry saw, thinking I would try a new technique. I have to admit I was a little bit intimidated. Yes, I broke blades 🙂 but I learned that the saw needs to be lubricated at ALL times! keep it straight and you’ll be fine. Oh did I mention Practice? Practice? Practice? I bought two huge sheets of copper, I couldn’t bear the thought of wasting sterling silver, especially with the price skyrocketing these days. But I did get enough guts to make a naughty cat charm. I turned it into a pendant necklace!

hand cut sterling silver cat pendant necklace

Figuring out your ring size

The most accurate method of finding the proper ring size for your finger would be to visit a local jewelry store and ask for a sizing. They usually offer this service free of charge.

Another method which you can try at home is using a string, a tape measure and the ring size chart listed below.

1. Find a piece of string.
2. Wrap it around the base of your finger.
3. Use a pen to mark the point on the string where it overlaps to form a complete circle.
4. With a ruler, measure the length from the starting end of the string to the pen mark.
5. Use the measurement and the chart below to determine your ring size.


Ring Size Circumference (in mm)
4 50 mm 5 53 mm 6 55 mm 7 57 mm 8 60 mm 9 63 mm 10 66 mm 11 68 mm 12 71 mm 13 14 76 mm


Simple Daisy Flower Necklace

I thought I would post one of my latest creations. It’s a flower pendant necklace. I hand formed the daisy using fine silver, fused it and tumbled it forever. I just love the way it turned out! It’s so light and simple! I had a hard time trying to decide how to present it as a necklace with out taking the spotlight away from the daisy. I didn’t want to over do it either with unnecessary bells and whistles. So I just hung it on a sterling silver chain and added a 7mm white freshwater pearl. Enjoy! 🙂

Simple Flower Pendant Necklace

Three Peas In A Pod jewelry

I’ve been working on some new necklaces, because.. well I’ve got a million earrings, I’ve been a little nervous about it, just because, I’m not a necklace making person! But then that was true about earrings! I love to wear them (necklaces) thought! So I thought I would start with pendants and made a cute little peapod necklace using 7mm green freshwater pearls. I also tried 8mm white freshwater pearls I think both turned out very nicely. Check out the green one!
peapod, pea,pod,green, freshwater pearls, sterling silver

Tools Of The Handmade Jewelry Trade

I was recently looking at my tools and decided, I needed to update a few of them. Most of them came from my Brothers or Dad’s workshop, and I haven’t been living at home for…. well, a long time! So, yeah I needed something new!

A word of advice… Never buy any handmade jewelry “Tool Kit” of pliers, needle nose, cutters ect… from a craft store. I told my hubby I was thinking of asking Santa for some new jewelry tools and he took the initiative to get me some jewelry tools. (I did tell him I had no intention of breaking the bank when I did this.) Well, needless to say, those jewelry tools are now in the garage and my husband got himself a new set! I love him for trying though!

After that episode, I thought, maybe I should splurge. Don’t get me wrong, going with economy jewelry tools is fine! I have a few inexpensive jewelry tools myself, but I bought those from a handmade jewelry supply site and they work great! So if your starting out, those will work just fine.

So buying a few new tools for making my handmade jewelry dwindled down to one “AWESOME” tool. I went with new wire cutters. I searched high and low trying to get some feedback on which was best.. Low end jewelry cutters, high end jewelry cutters. I didn’t really find anything, or any opinions. I did find that every Tom, Dick, and Harry was selling them, saying theirs was the “BEST” jewelry tool around! But I couldn’t really find any reviews.

What jewelry tool did I go with?

Lindstrom 8141 flush cutter.

How did that work out?!

I have to say, I like the way they feel, and it cuts my sterling silver wire very nicely! Very Easily! If I were to change something… maybe, perhaps next time I would go for a super micro flush cutter. It cuts both ends of the wire straight, instead of just the one side like the one I have. Would I return this cutter?? NEVER!!! I love it. Definitely worth the money.

Now I need to look into some new round nose pliers!